

How To Save A Preset
How To Save A Preset
Saving You Time By Making Your Own LR Preset
To preset or not to preset? This is the question every photographer asks. When I first started photography, I got sucked down the preset hole very much like in Alice in Wonderland. There were so many amazing presets out there to try and purchase. However, the more I used them, I couldn’t quite get the look that I was trying to achieve. So, I decided to create my very own base preset.
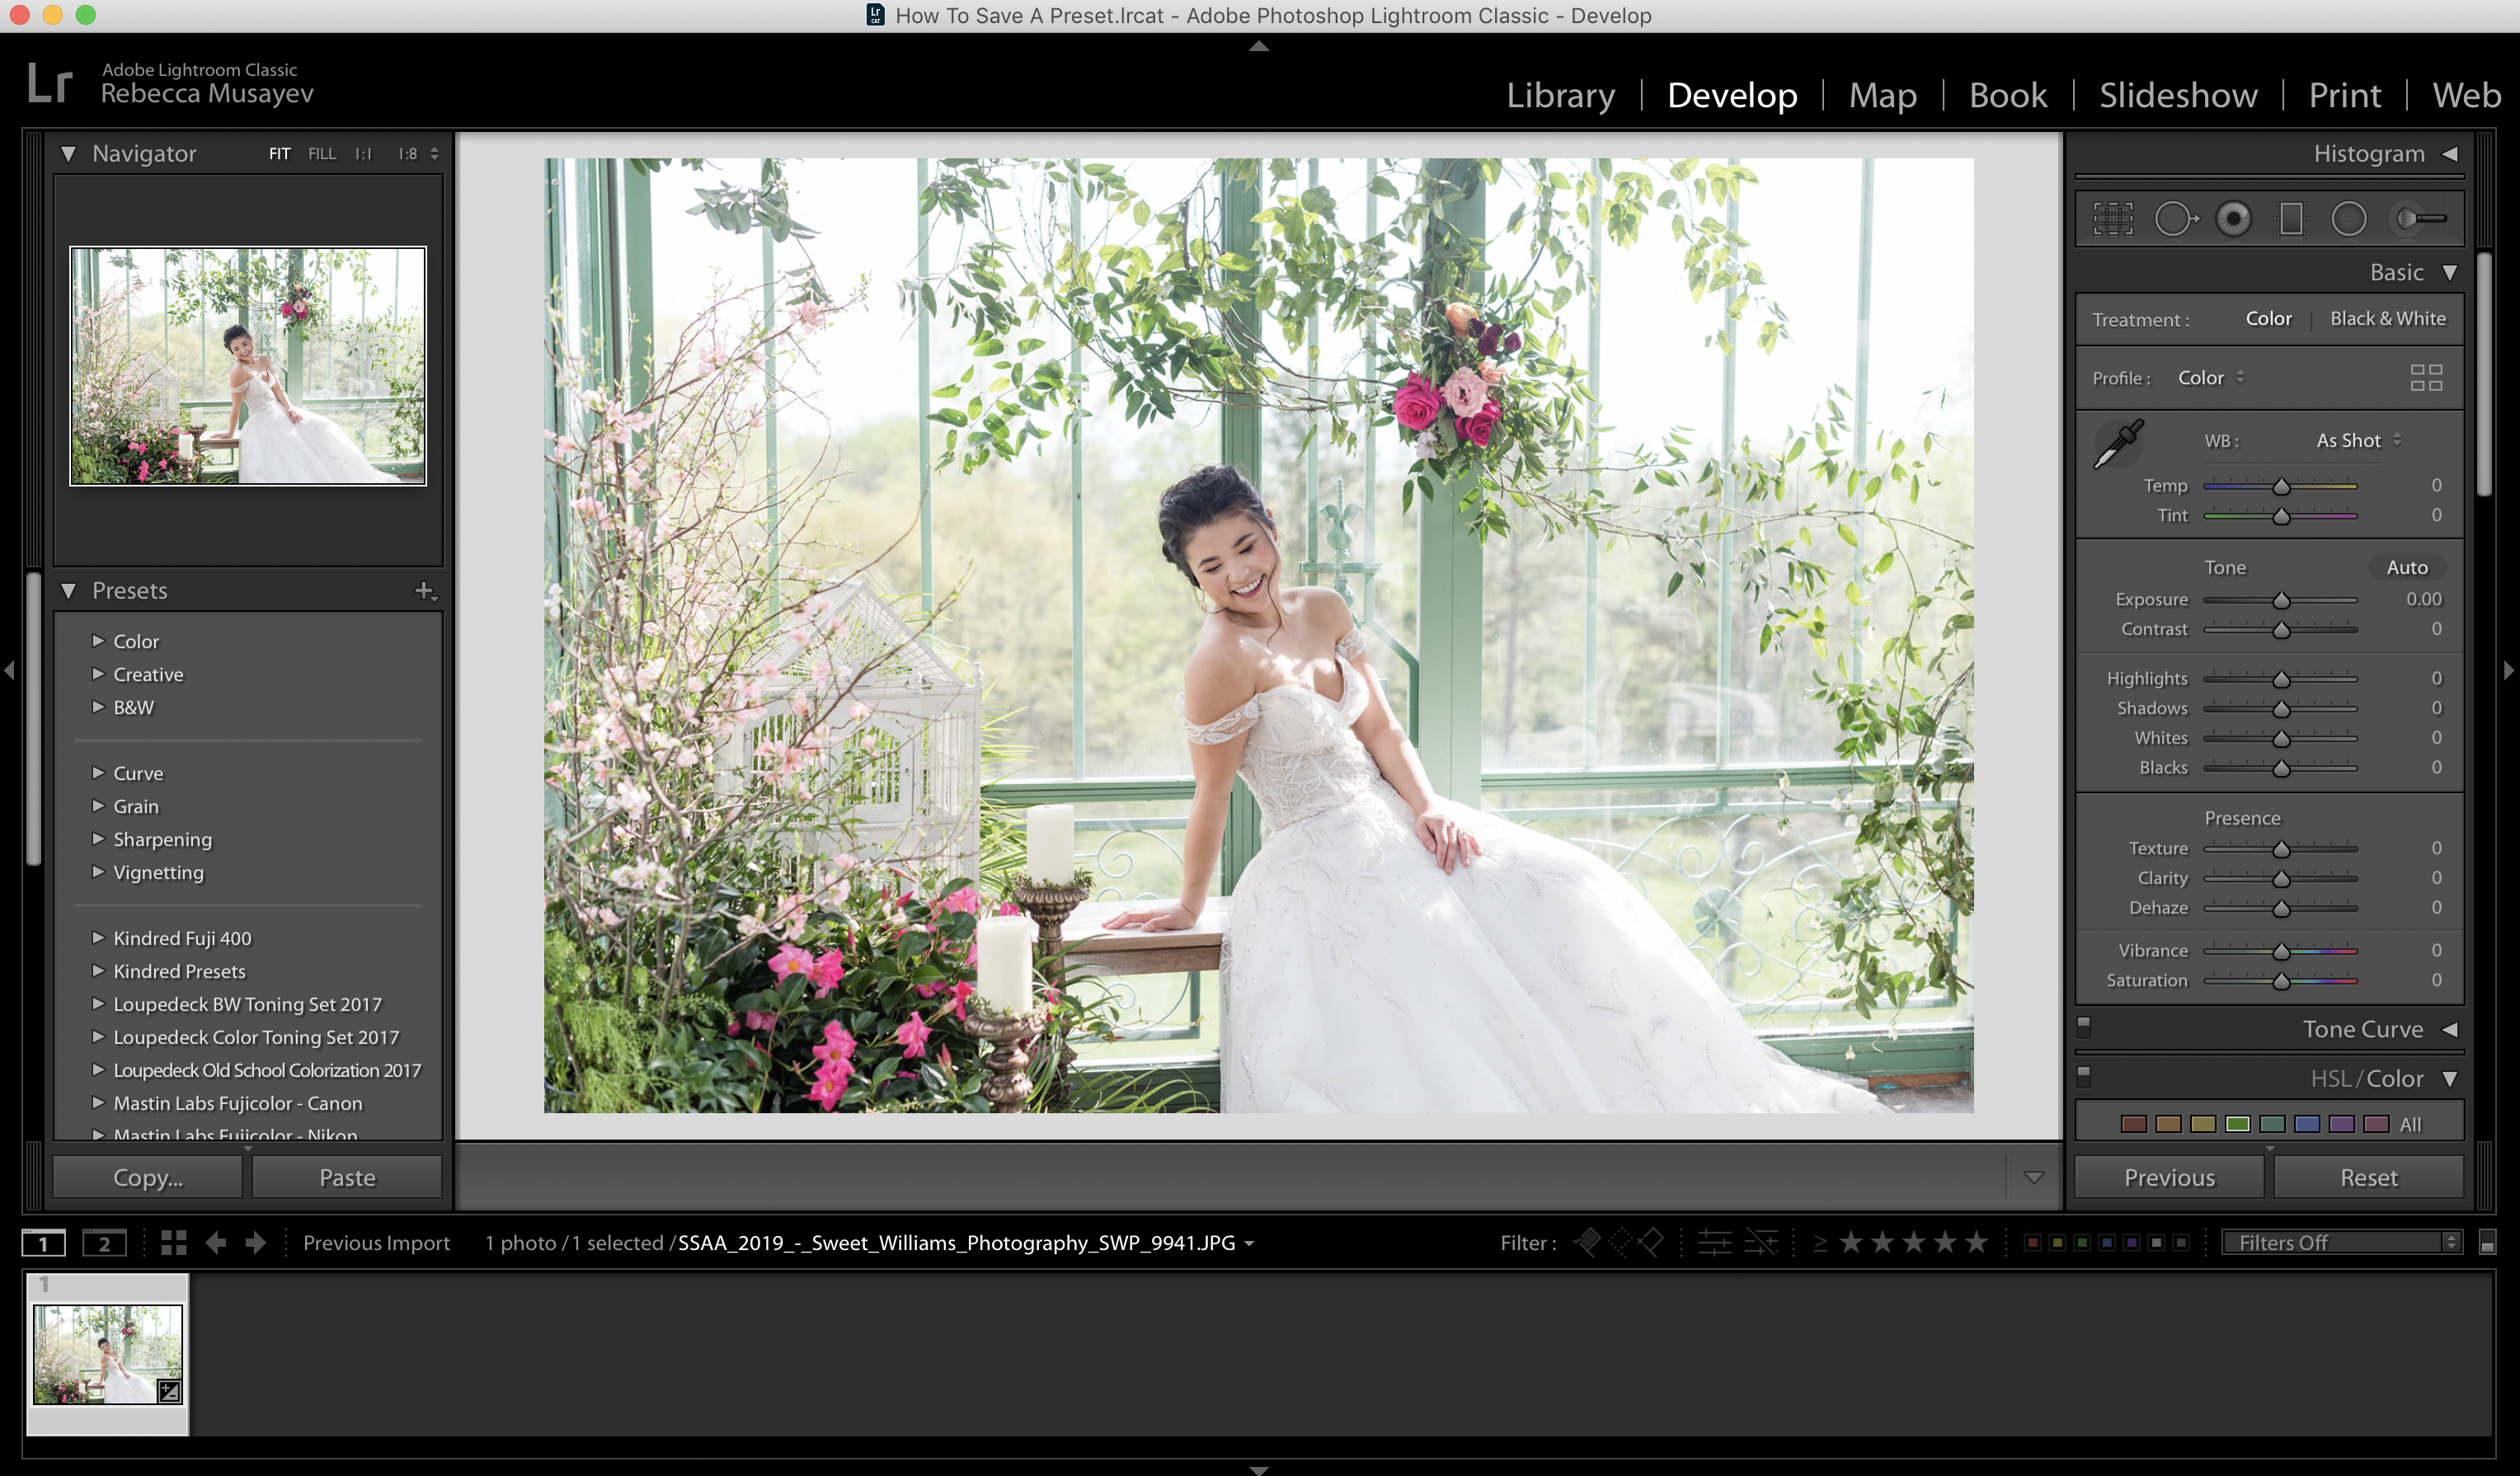
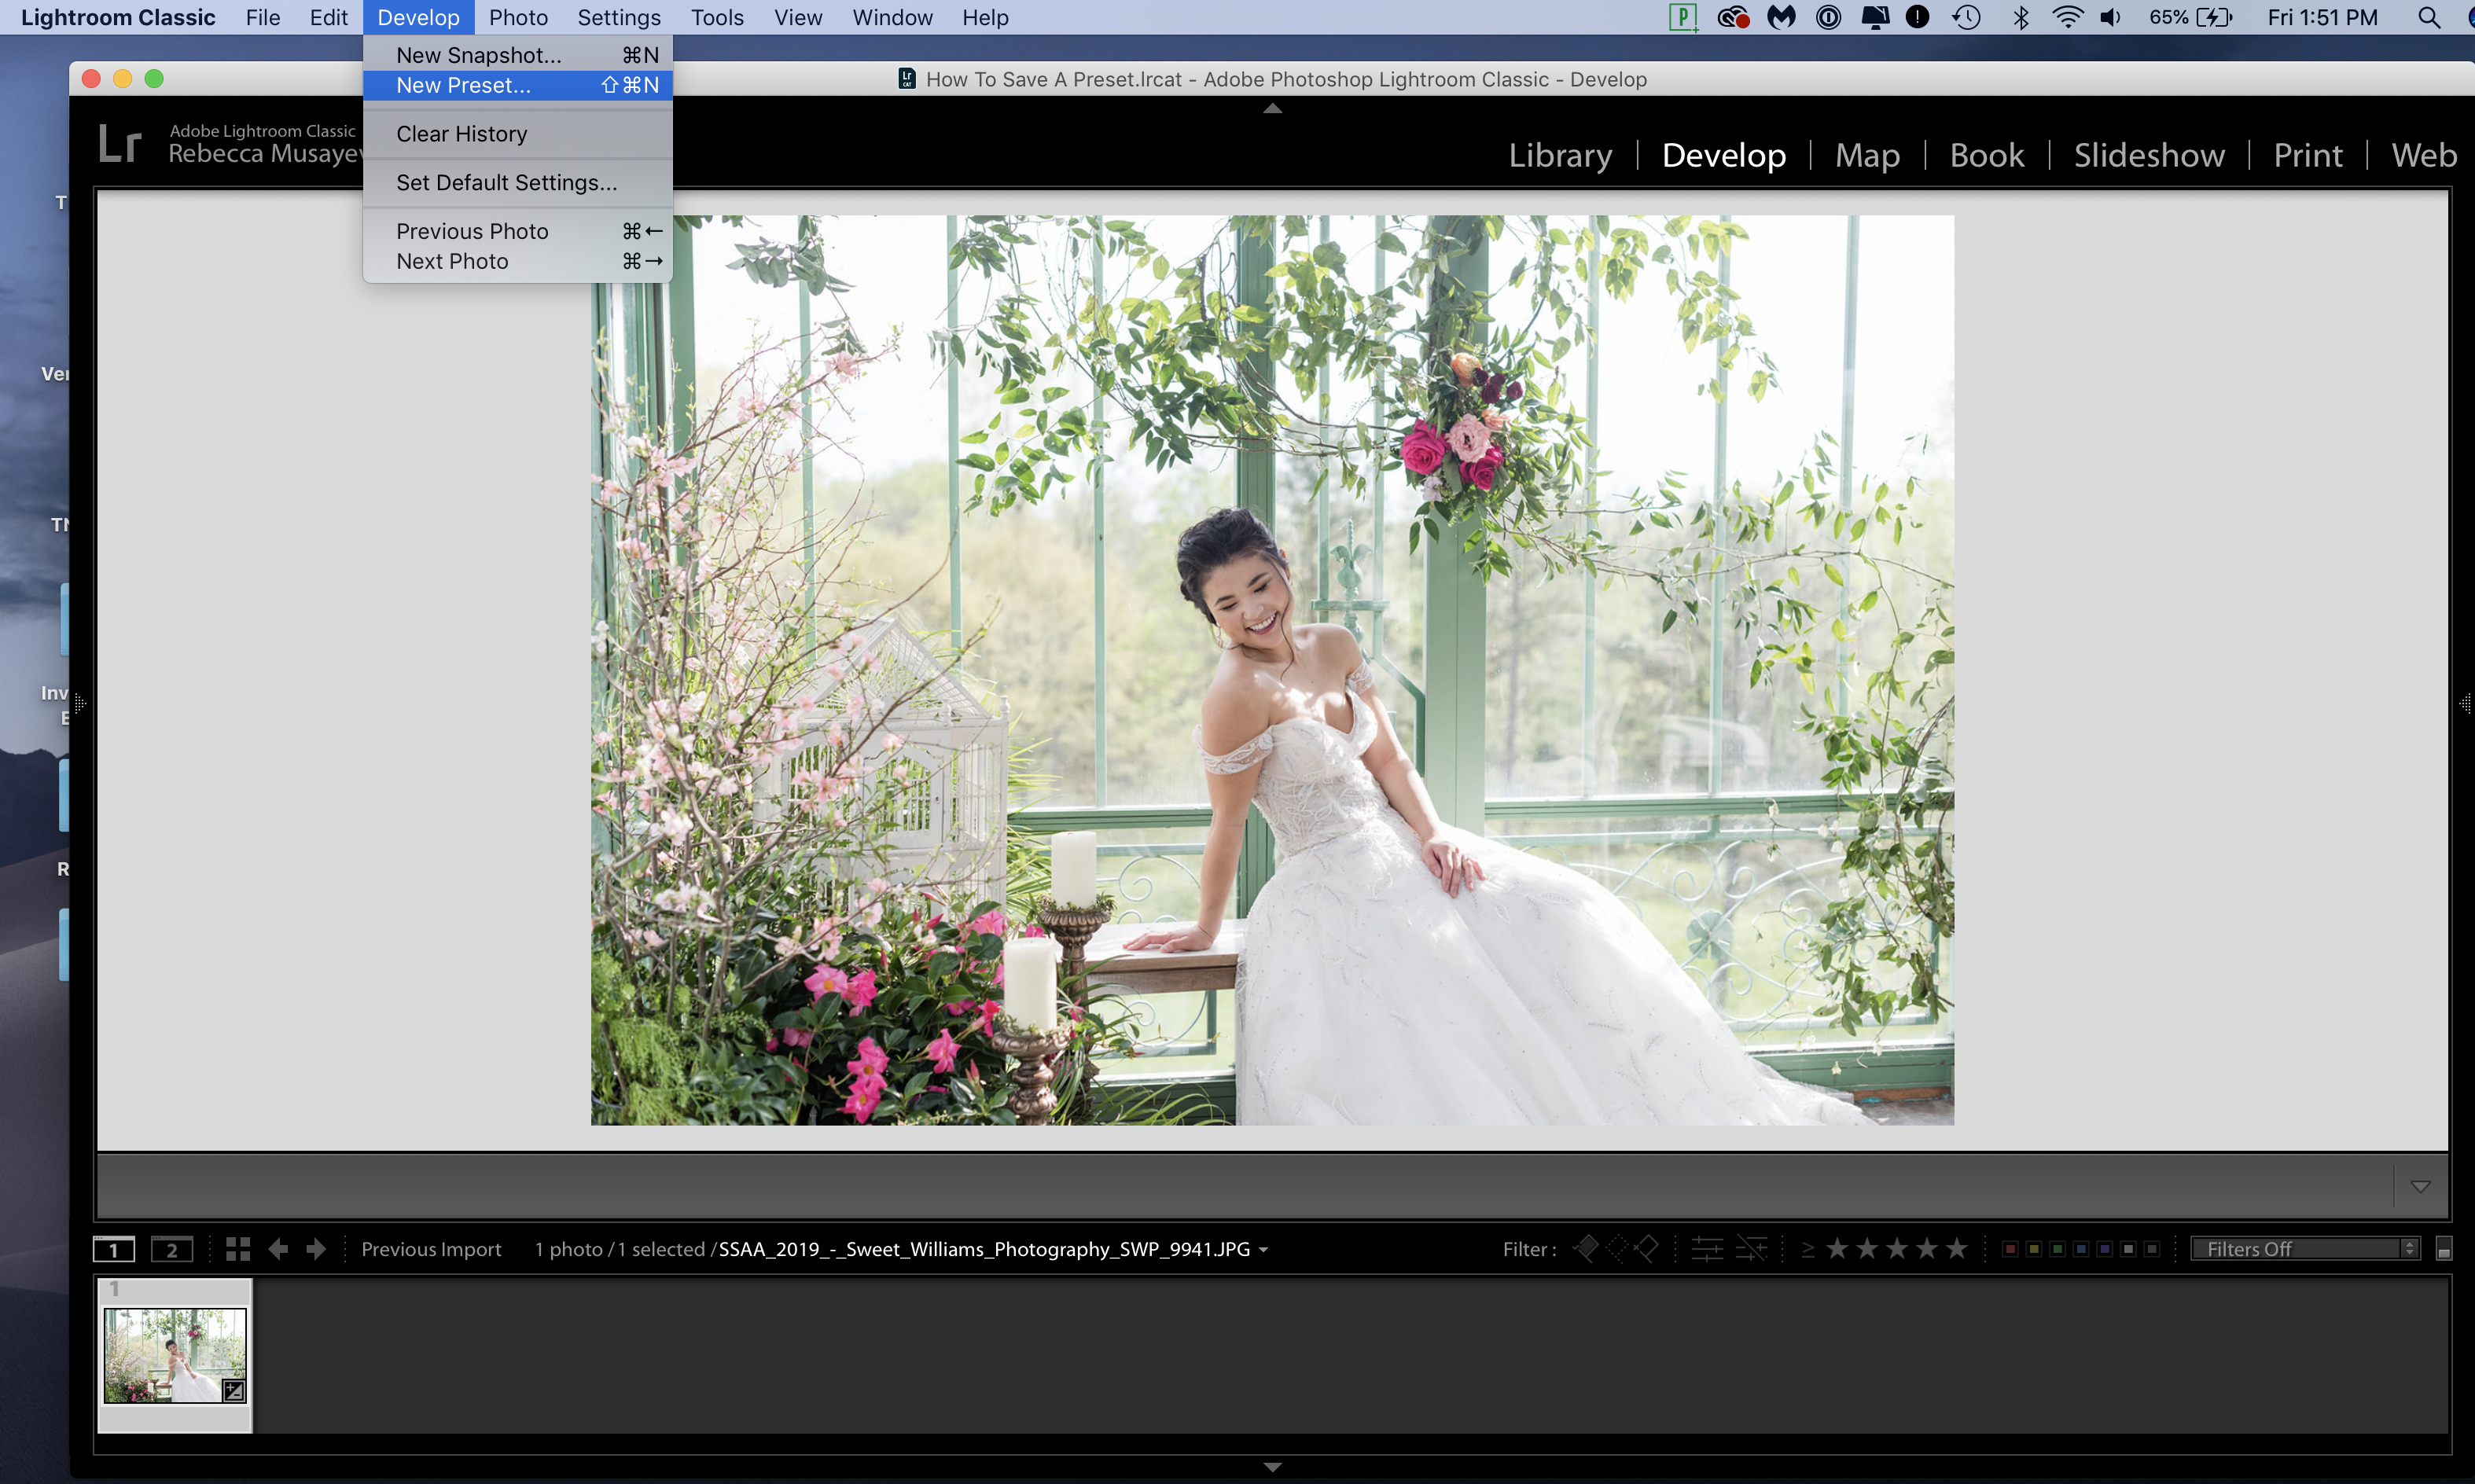
I started with one photo in Adobe Lightroom. I applied all my changes that I would normally make on all of my edits. Of course, there were special tweaks for different lighting situations but I just wanted to create a base layer that I could easily apply to any of my images. Once I was happy with the base layer, I went to “Develop” –> “New Preset.”
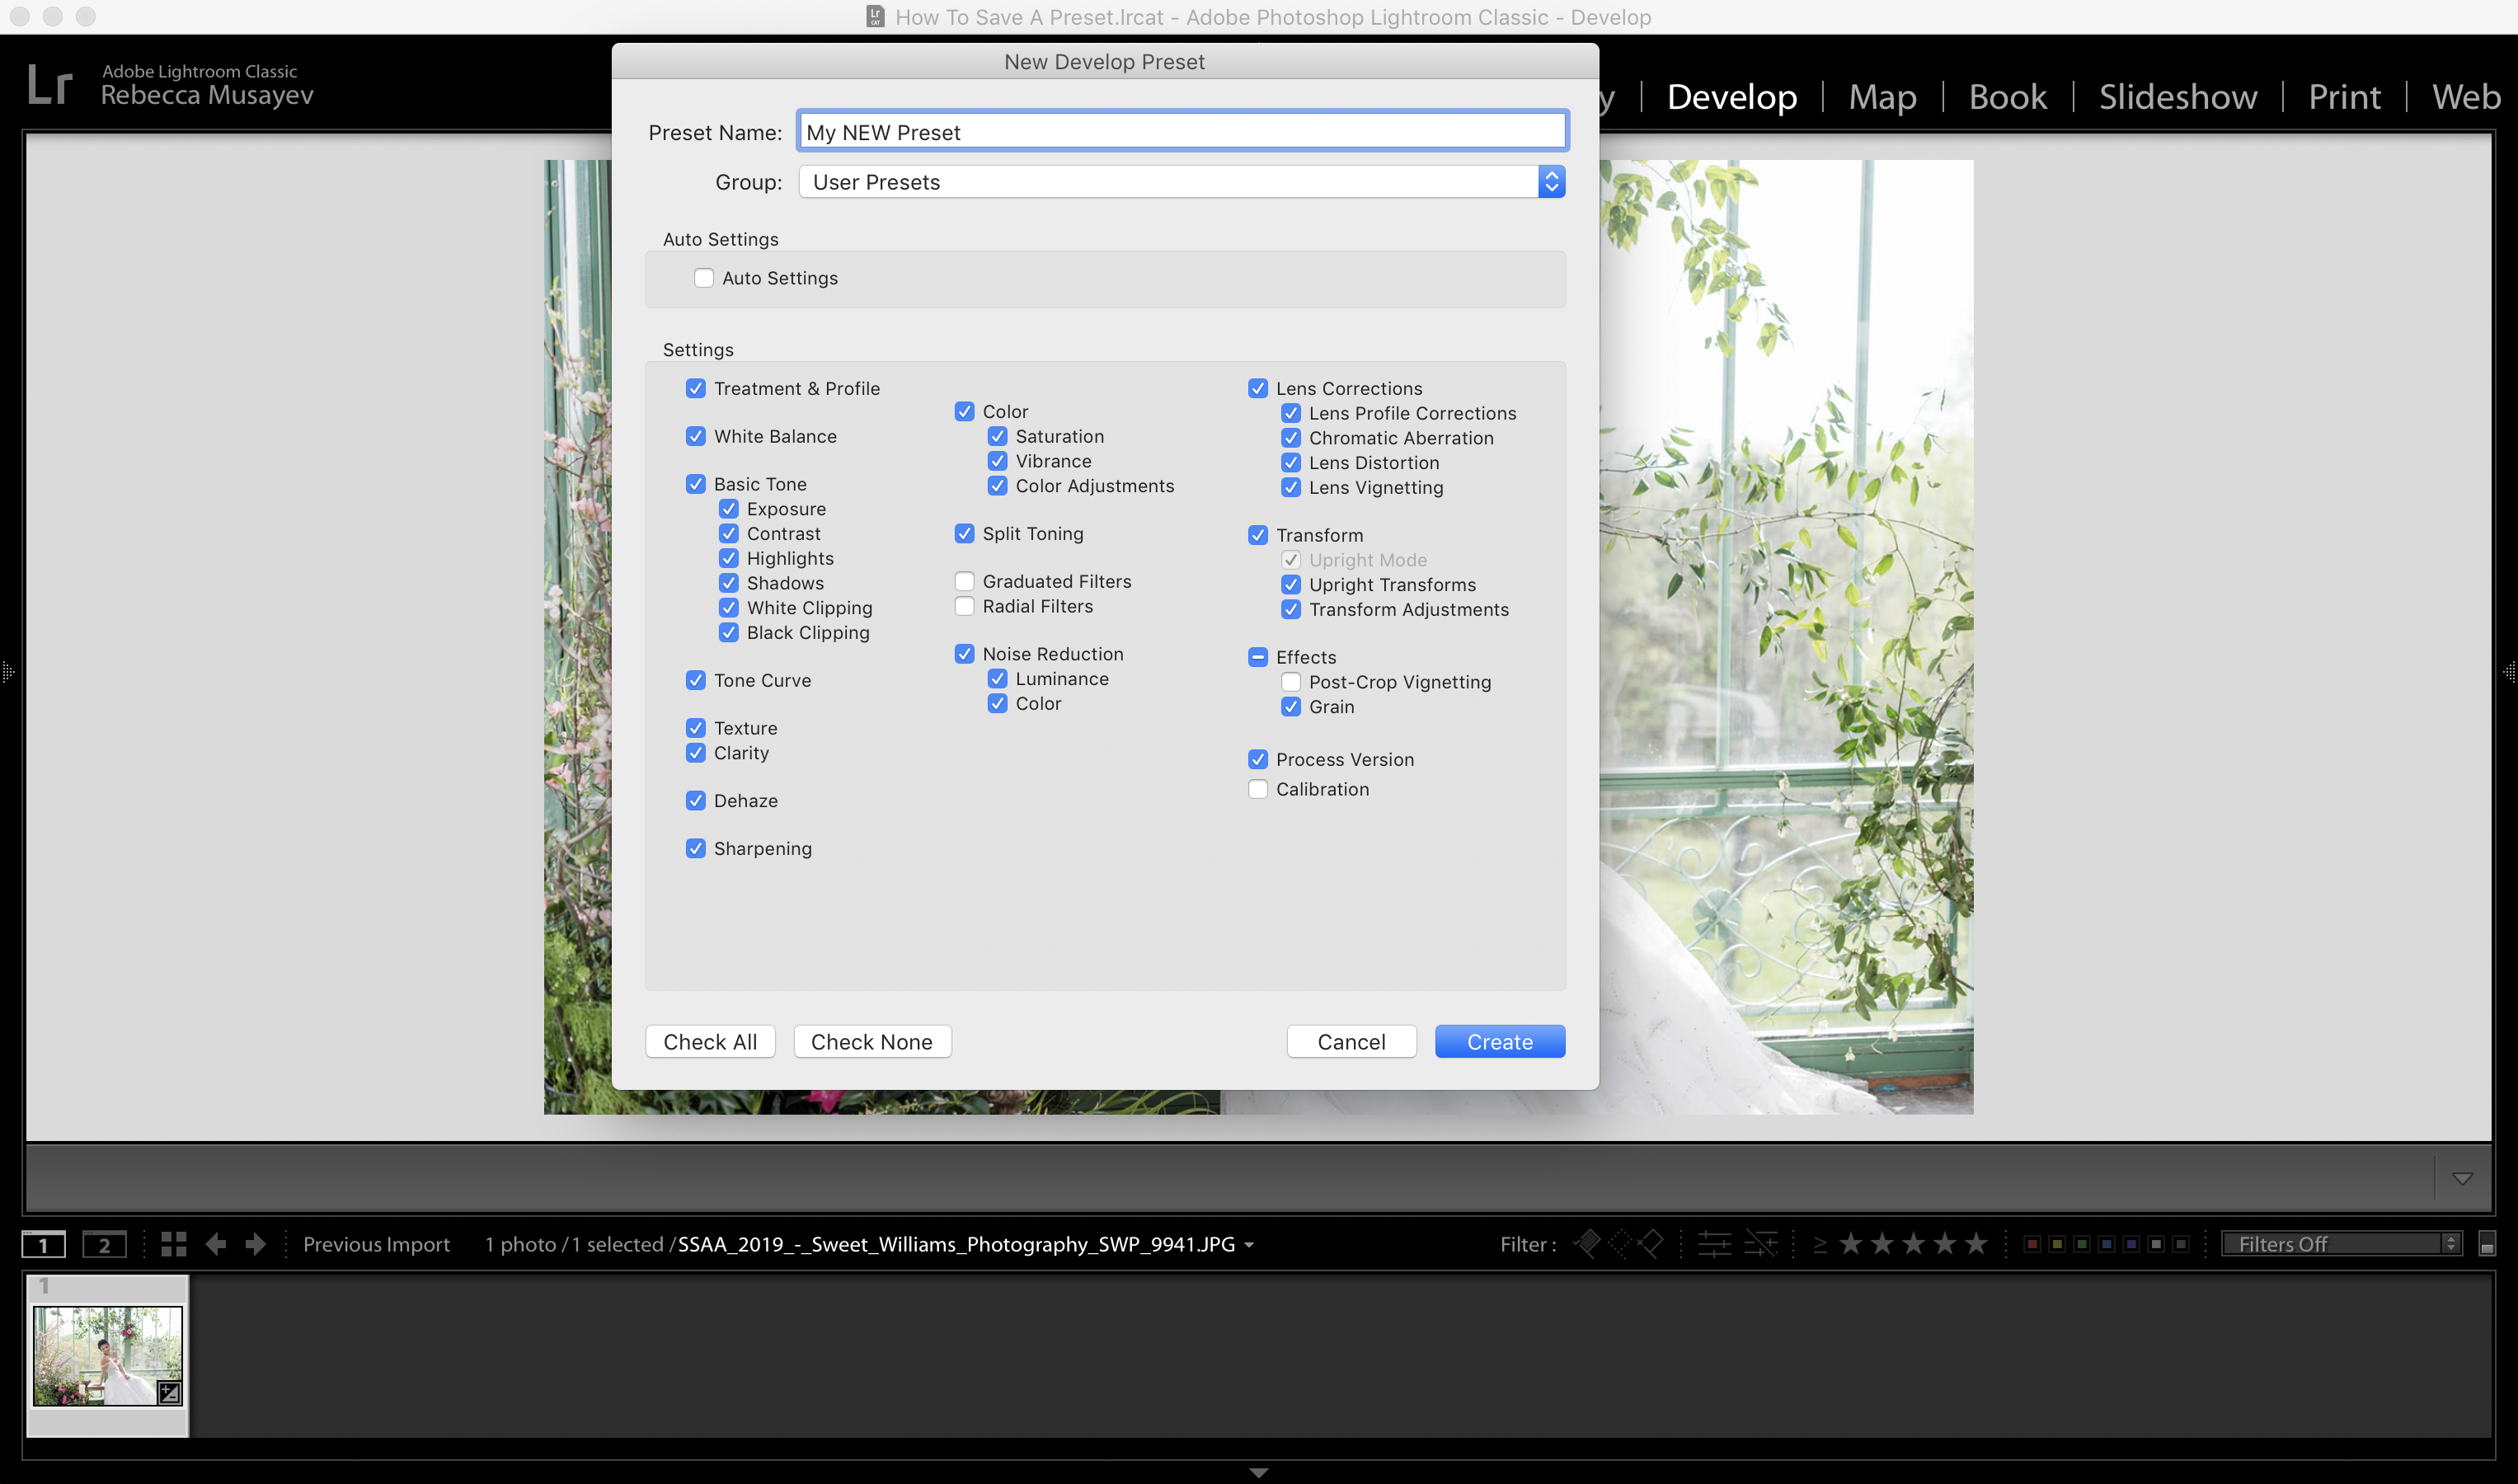
From there a new window popped up. I could name my preset and select what settings I wanted to apply to that particular preset. All I need to do is hit the “Create” button. My newly made preset will appear on the lefthand side of Lightroom under “User Presets.”
Creating your own preset is not only a time saver but it makes editing SO much easier. I also create special presets for locations I shoot at often. This could be certain parks, venues, etc… There’s no limit to how many presets you can make! I hope this was helpful to your workflow! It’s an easy tip that will save you time on your editing! If you have any questions please don’t hesitate to reach out HERE.
Saving You Time By Making Your Own LR Preset
To preset or not to preset? This is the question every photographer asks. When I first started photography, I got sucked down the preset hole very much like in Alice in Wonderland. There were so many amazing presets out there to try and purchase. However, the more I used them, I couldn’t quite get the look that I was trying to achieve. So, I decided to create my very own base preset.
I started with one photo in Adobe Lightroom. I applied all my changes that I would normally make on all of my edits. Of course, there were special tweaks for different lighting situations but I just wanted to create a base layer that I could easily apply to any of my images. Once I was happy with the base layer, I went to “Develop” –> “New Preset.”
From there a new window popped up. I could name my preset and select what settings I wanted to apply to that particular preset. All I need to do is hit the “Create” button. My newly made preset will appear on the lefthand side of Lightroom under “User Presets.”
Creating your own preset is not only a time saver but it makes editing SO much easier. I also create special presets for locations I shoot at often. This could be certain parks, venues, etc… There’s no limit to how many presets you can make! I hope this was helpful to your workflow! It’s an easy tip that will save you time on your editing! If you have any questions please don’t hesitate to reach out HERE.


